In my first post on this blog, I talked about why I started my tree in 2009 and how I needed a tree to figure out how I was related to my DNA cousins. You can say I learned genealogy and citing my sources on the fly. Do I cite like a professional genealogist? Probably not.
If you are just starting out with your tree, you are in control of your tree, where there is no right or wrong way to complete it. You can be as meticulous as you want with what you put on and how you cite your sources. Really, it is whatever works for you!
One could say I am a little lazy as I do not want to type if I can help it, so if I can copy and paste, all the better to make citing my sources less of a chore. Even though I try to make it as easy as possible, I still focus on what I think is important information so that when a relative reads my work, they can trace it back to the original source and my cite confirms my work.
So, this is what I learned on the fly……..
Source Printing and View
I learned pretty quick how Ancestry® saves my sources. Remember, I started my tree on Ancestry and, while there are other companies out there, once you start, I find it is hard to switch to another company and that is why a lot of my posts talk about Ancestry.
With Ancestry, you maintain sole control over your public or private tree. Your tree might just be a tree with people and no sources, or it could be very detailed with many sources.
Maybe the tree with no sources is someone that uploaded their GEDCOM tree they built on another website like MyHeritage or Findmypast. Most likely, they do this to get their tree in as many places as possible so other “potential relatives” will see their tree and contact them. Or they are building a tree for free and can’t access the paying member records. Either way, it gives “potential relatives” a good way to find each other and further their trees.
Tree Building
Ancestry makes it very easy to build, research and add sources to your tree, so what is the catch? The catch is how to print it with the source details or save your online tree with the sources to your computer if you want a copy of your tree.
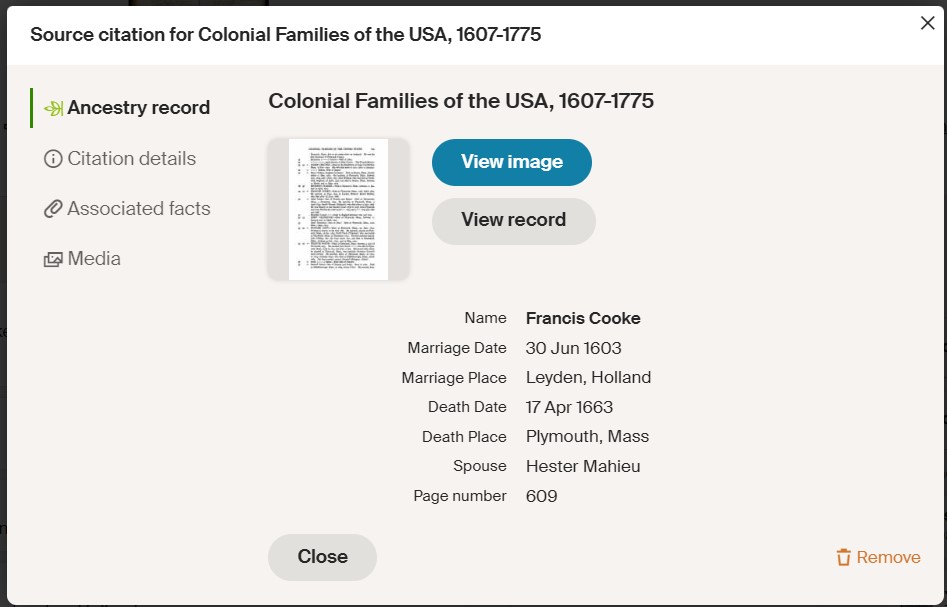
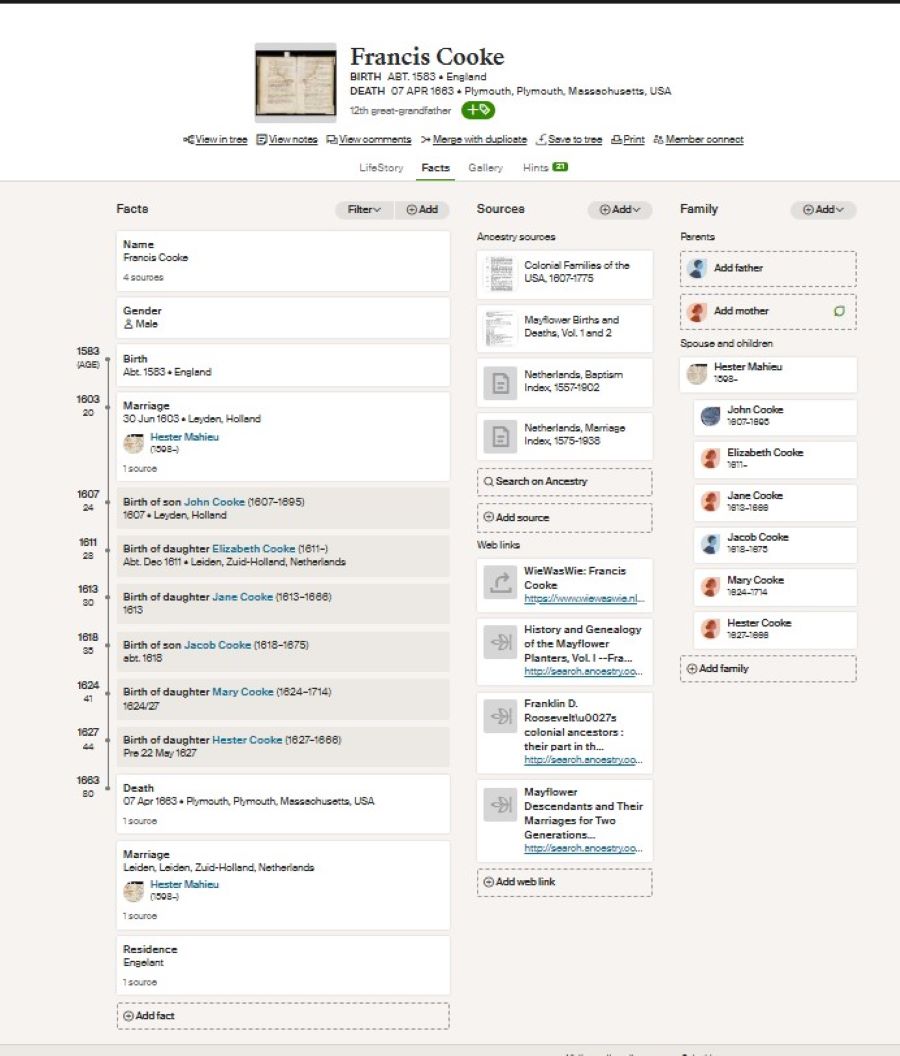
Here is a good example: when I open Francis Cooke’s profile on the Dru Family tree and see his entire page, you will see the sources listed. To fully see the source details, you need to click view.
This is great when you are online, but what if you want the sources in your personal tree that is off the internet? You cannot just click and download this page and save to your computer. The only option that I have is to click print at the top of the page. However, it again only gives a list of the sources, but not the full details like when I clicked on view.

My Canva and Software Programs:
You have two options to make a copy of this page with the sources included. If you are finished and have completed your tree, you can pay to publish with “My Canva” located top right when you click print icon. Another option would be to buy a genealogy software program that syncs to Ancestry. I know of two software programs that can do this: Roots Magic and Family Tree Maker.
It may cost $70-80, but think of it as an investment for your work. I invested in Family Tree Maker and, by using the software, I can keep an exact duplicate of my tree on my computer.
Another perk is it syncs to Ancestry, which means whatever I do in one, it will copy to the other and I can do other things like make photos private, where they are not seen when in public mode on Ancestry and can print all sorts of reports and charts, and if I want, I can print a book!
Family Tree Maker
Here is Francis Cooke in my Family Tree Maker and the source reports I can print:
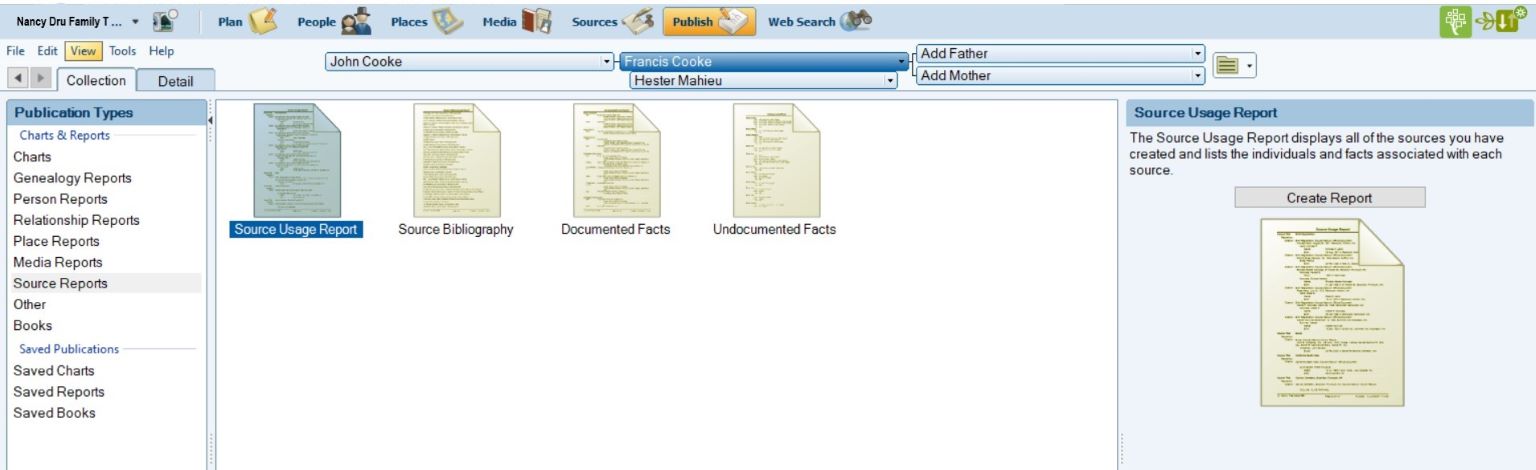
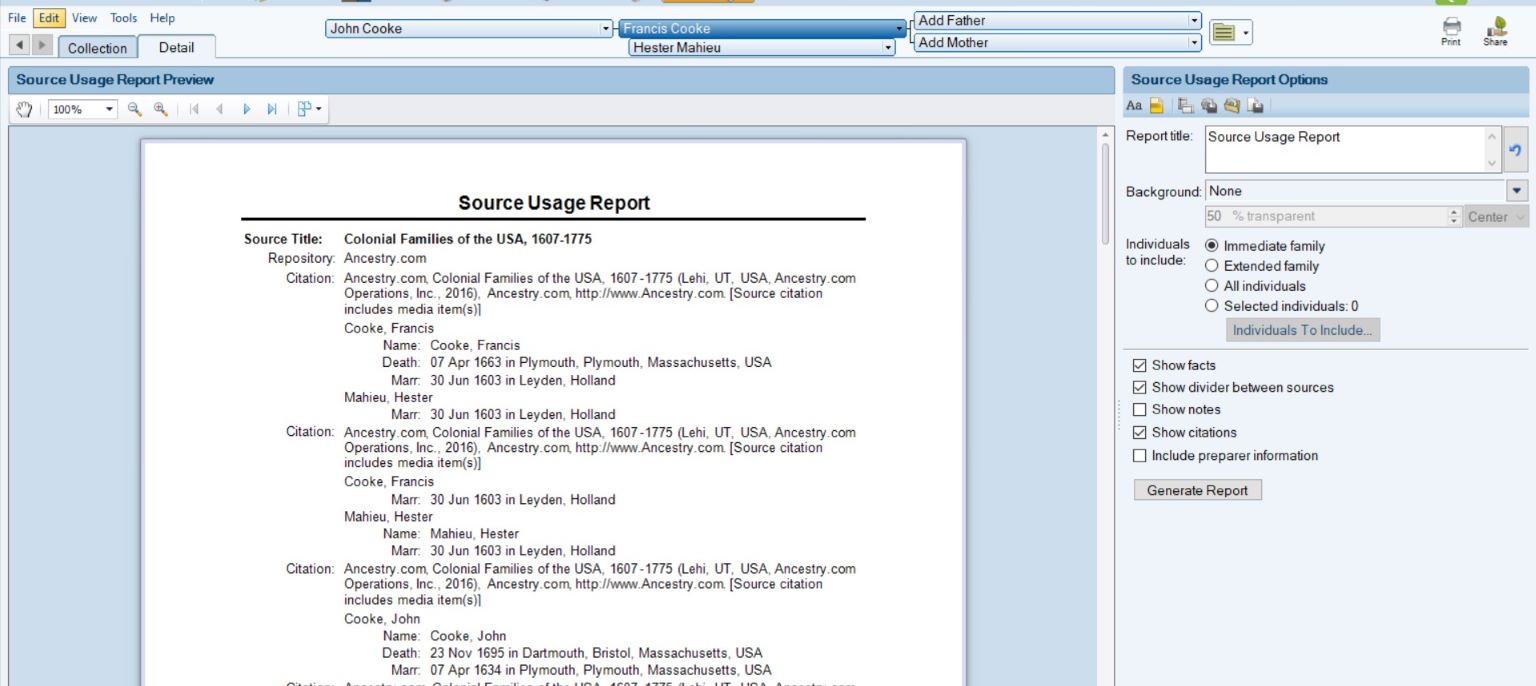
Hmm………… I noticed that Family Tree Maker is not perfect as I do not see the page information listed that I talked about under “view source” from Ancestry and, in its place, its citation includes media files.
With some further investigation on Family Tree Maker, I discovered the source does not have the view details, but a link back to the exact page on my Ancestry tree where I can then copy the information and put in a box called “Citation Text”. Here all this time, I thought it was copying everything exactly. So, a little more work is needed to have the source showing the details like the page number, etc.. I am not sure it is worth my time as I have over 26,000 people in my tree.
Main Things to Remember
The main thing to remember is your online tree will automatically save the facts that you selected as a source. When trying to print, it gives a list of the sources but not the “view” details for that source and can only be viewed while on the internet tree.
To have a detailed copy of the ancestor’s page, you need something else to print or save the tree details that also includes the detailed sources and, if wanting more details, you can copy and paste it to the source citation box in Family Tree Maker. Again, you decide how fussy you want to be.
Remember, even if you are not a paying member on Ancestry, you will still have access to and be able add your own records/photos to your tree. You won’t be able to access any Ancestry sources that you added unless you made your own copy. To read more about that, click here.
Enough about Ancestry and Family Tree Maker. You are probably wondering how I cite the sources I personally add to my online tree?
Adding Your Own Sources
Do you have a problem with old photos that don’t list who is shown in the picture written on the back? Or the people that would know are dead? When adding my own photos, I use the mentality of ‘I might be the last one that can identify the people in photos’, even if the photos are of me!
In the beginning, I did not pay attention to the details and have to play catch up on my tree. So, now that you know I am not perfect, this is what I developed on my own after a while of adding photos.
I give as much detailed information as I can. If it is a portrait photo that came from my own personal collection, I will state it, or alternatively, that it came from another family member. Next, I report all the people in the photos and make sure I use directional words like front left to right.
Then I date when I added it and put my initials. I guess it is my signature mark. and if I know when and where the photo was taken, I will include that information too. Adding photos and other personal images are easy, but what about images that you find elsewhere?
Internet
For an original image of a document that I find on the internet, I will again state where the image was found with the website title and the title of the record, the url of the website, and the url of the image and I will also give the facts from the image; for example, a Baptism will include the child’s name, parents’ names and the date/s.
Sometimes, the original image is hard to read or is in another language where I needed help with the transcription. It all goes in documenting my source. A lot of this information is just a matter of copying and pasting. I try to make it as easy as possible, so it is not too time consuming.
If you are like me, where you use FamilySearch for your record research and find records that have only been indexed, indexed including the image, or you find it in their catalog. Here is a little true story: I visited the FamilySearch Center so much to use the microfilm reader for my British wills and parish records that the director of the center asked me to be a community volunteer. I love it as I love helping people, and that is why I ask each of you to contact me if you ever need help.
Now, back to citing sources. In each case I mentioned, I try to make it is as easy as possible for me with my favorite tools: copy and paste, and snip and sketch at my fingertips.
Only Indexed:
What I like to do is use my snip and sketch to create an image of the index. Then I will attach the image to my tree and fill out the image information in the description, then go back to the index on FamilySearch and click “Save” tab. A little menu will drop down. Next, click “Copy Full Record” and paste in the description box on Ancestry.
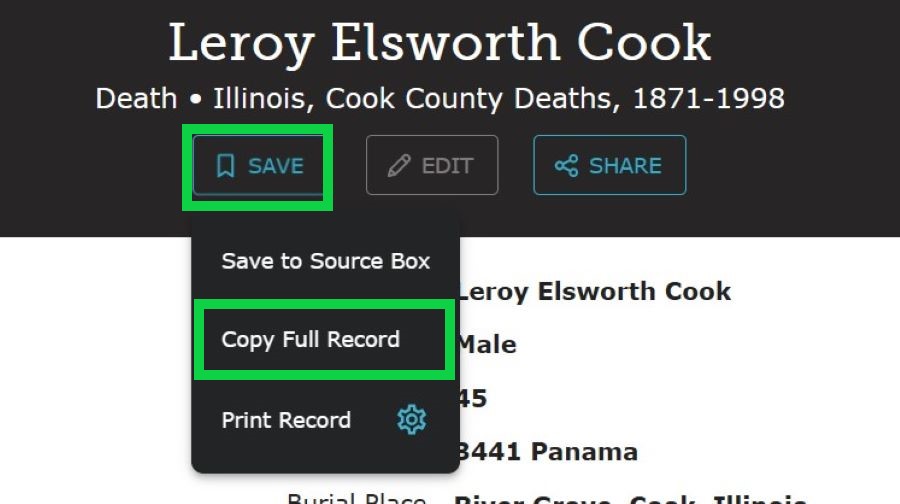
As seen in my images, it looks really good, and all I did was copy and paste.
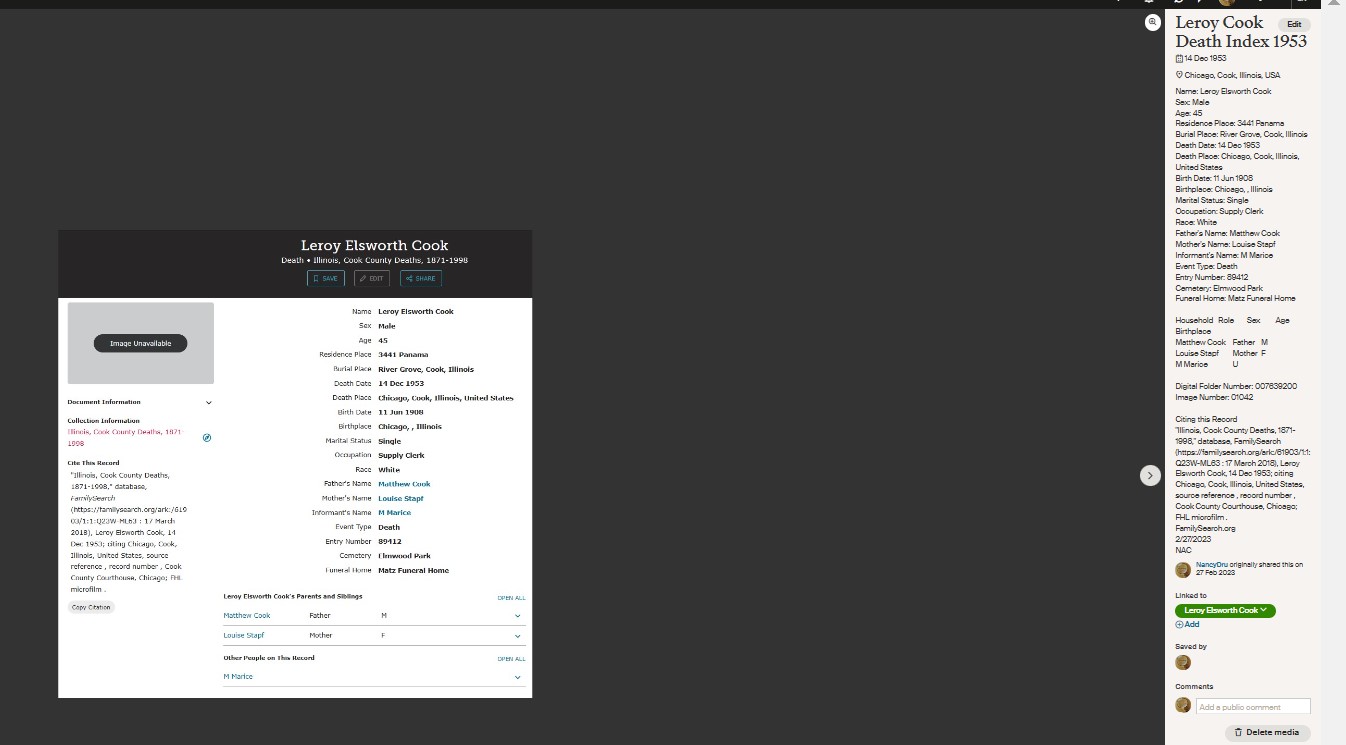
Index with Image:
Now, the only difference in the index and image is that the image is attached to the index on FamilySearch. So, I open the image and download and save the image to my computer and then upload it to my Ancestry tree. Again, I use the “Copy Full Record” on FamilySearch and paste it on my image photo.
One other thing I like to do with the actual record is to use my 3D Paint to select the record that pertains most to my Ancestor if there is more than one person on the page. I like to keep the record in its original state. That is just me, but other people will do a snip of just their ancestor on the page.
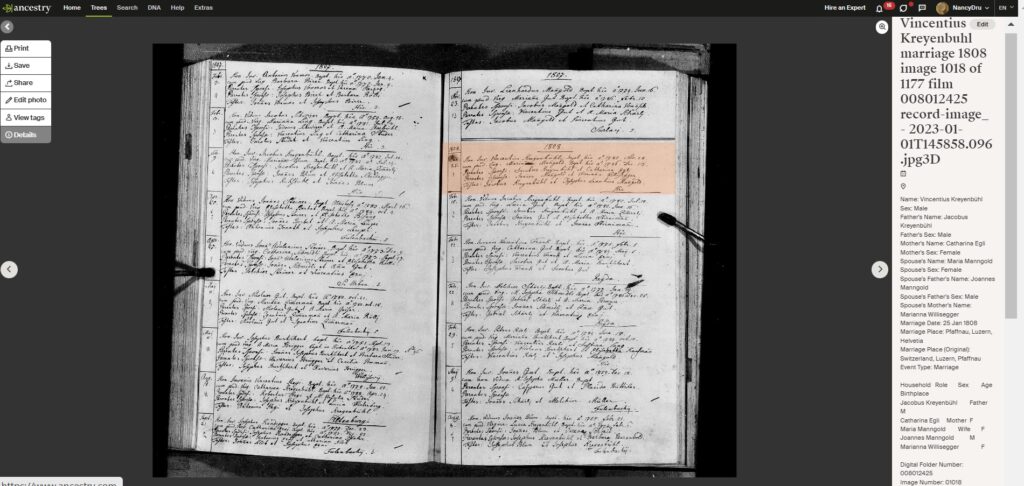
Catalog:
On FamilySearch, you can also search for records in their catalog. What this means is that these records have not been indexed yet. Here, you will need to use your sleuthing skills. One snag you can encounter is that, to view the record, you might need to be onsite at the locations like your nearest FamiySearch Center or FamilySearch Affiliate. Now, if going to a center is not an option, you can have the library do a lookup for you and send you the record. If you are interested in how to have a lookup, click here.
In this example, let’s assume I found the record in the catalog. Once I find the record, I save it to my computer and with the ancestor’s name, the event, listing image location and film number. This way, if I ever need to go back to the original record, all the information is right there to trace it back.
Like the index and image, I will highlight my ancestor if more than one is listed on the image. Now, to cite the source, I will go back to the catalog and copy and paste the information that FamilySearch documented for the record. Then, I add my information: the names and dates in the record, image and film numbers, the date I entered it on my tree and my initials.
When adding with all 3 cases, the last thing you might want to do is link all the ancestors that the records pertain to then, if you want to make it a profile photo, you can click on the downward arrow and tick “Use as Profile Image”. Lastly, click save.

Citing Your Sources
I started doing my tree on the fly as, originally, I was making a tree to figure out my DNA cousins’ relationships. After I started, I was hooked on researching my ancestors and it wasn’t long afterward that I started to make sure I was citing my sources.
All of my sources that were added directly from researching on my tree on Ancestry were automatically cited by Ancestry. The challenge came when I needed to cite my own sources for the images and documents I personally added to my tree.
My way might not be the professional genealogist way, but it is easy for me. Each family tree is unique, and each tree owner can do as little or as much as they want with citing their sources.
As long as you or any family member reading your history can go back to the original source, then you have accomplished your goal of citing your sources. A great ending or a new beginning for the next family genealogist.
It's Not a Mystery
Signup for Email Post Alerts: