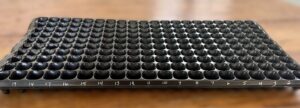
I came up with this simple idea, so I don’t have all these little markers sticking in a 200-cell tray (1 inch by 1 inch squares). I knew these trays would be mixed varieties of flowers and vegetables so I needed something super easy where I can keep track of the tray and what was planted.
Depending on the color of your trays, which usually are dark I used white 1.2mm fine tip acrylic markers. I bought a set of 6 inexpensively at my local Walmart, which was cheaper than buying a single white acrylic white marker. Now I have other color options when the need arises.
My Directions:
- Follow directions to get the paint markers flowing.
- Label Trays I used numbers and put the number of the tray in front center (the short side).
- On the left front I use the number 1 with an arrow pointing to the right to indicate my seed planting direction.
- The left side (long dimension), I labeled the rows 1-20.
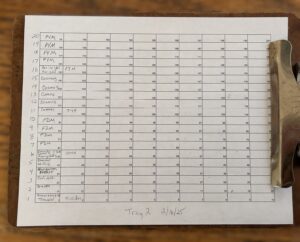
After labeling the trays I made a master spreadsheet with boxes exactly like my tray, starting with number 1 in lower left corner and numbering each cell up to 200.
When I plant, I fill in the spreadsheet and to keep things simple by planting rows of 10, avoiding any breaks.
On each row on my chart, I document the variety and germination range.
I am very happy and now I don’t have to keep track of little markers that could fall out or get in my way when tending to them.
If this helped you, please comment or contact me.
Happy Gardening!
Nancy Dru

