Back in January, I shared my growing plans for the Pickle Patch, deciding which varieties of tomato and cucumbers I would trial this season. I am in the midst of planting, and it is the perfect moment to catch you all up on my new and improved, and sometimes by-the-seat-of -my-pants farming methods I am using this season. First up: Germination Station.
Germination Station
What can I say? I love my new Germination Station. The only problem? I probably need two more! I thought one Germination Station would handle all my needs—was I ever wrong.
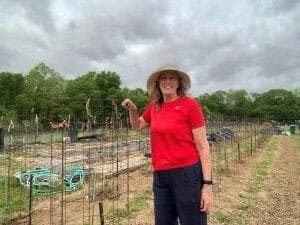
You need to understand that I’m going way overboard with tomatoes this year. Last season, I had 16 Big Beef plants, 8 Romas, and 8 Opalkas. But this year? 111 tomato plants—is that a little much?
As I explained in my January blog, I wanted to trial different varieties that could handle our hot, humid, rainy weather, planting at different times throughout the season.
Besides trialing, I’m also feeding four families and providing fresh produce every Tuesday to our church’s food pantry, where people drive through to receive a bag of assorted pantry staples and fresh vegetables.
It didn’t take me long to figure out what I needed to do to handle all these plants.

Handling All These Plants
I started the first batch of tomatoes—along with all the extras—which totaled 65 pots. But soon, I’d need to start the next batch, as well as my other veggies like basil and peppers. I had to get creative with my handling strategies to make room for everything. Thankfully, I had a month before the next round of planting.
I learned that the seeds I was planting don’t need light to germinate, but once they sprout, they do. To maximize heat space, I lined up interlocking germination pads on the hearth room floor, fitting them neatly together. Then, I decided which tomatoes would go in large containers and which ones could be started in 200-cell plug trays. I made sure that seeds in the plug trays had similar germination times to keep everything running smoothly.
While the new seeds were on the germination pads, I literally pushed my Germination Station—which is on wheels and super sturdy—to my covered patio to start hardening the tomatoes outside. Not a single plant fell off, thanks to the lip on the cart shelves! From there, the plants moved to my temporary greenhouse, nestled between two trees, before heading into the Pickle Patch. This rotation kept the Germination Station free for new batches.
But even with all this space, I quickly realized I didn’t have quite enough room. My auxiliary grow light—set up in my upstairs bay window—became essential. The adjustable stand lets me position the grow light just a few inches above the plants, raising it as they grow. I can also open the window to let in natural sunlight, helping to further their development.
Once the seeds in the plug trays germinated, after some time had to be transplanted, which meant another round of moving plants—from the cart to the covered patio, then to the greenhouse.
By the time I reached the third batch of tomatoes for mid-June planting, things are back into a normal routine. But since two gardeners wanted Big Beef tomatoes, and we dubbed this planting our fall tomatoes, I found myself relying on my auxiliary grow light once again!
Now that all my plants are growing and ready to be planted, I turned to Bluebee-aka copilot-to help design my soil recipes, giving them the best possible start. Here’s how I did it.

My Designer Soil Recipes
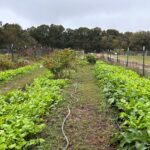
This is my fourth year at the community gardens, and even with all the soil amending—what can I say? It’s still clayish. I’m using cover crops, compost and mulched leaves to help, but I’m still a long way from having the loose soil you see YouTube channels, where they scoop a planting hole with their bare hands.
I decided to give Bluebee—an overview of my soil and amendments, and together, we went back and forth discussing the right amounts. After refining the details, we came up with variations tailored to what I’m planting.
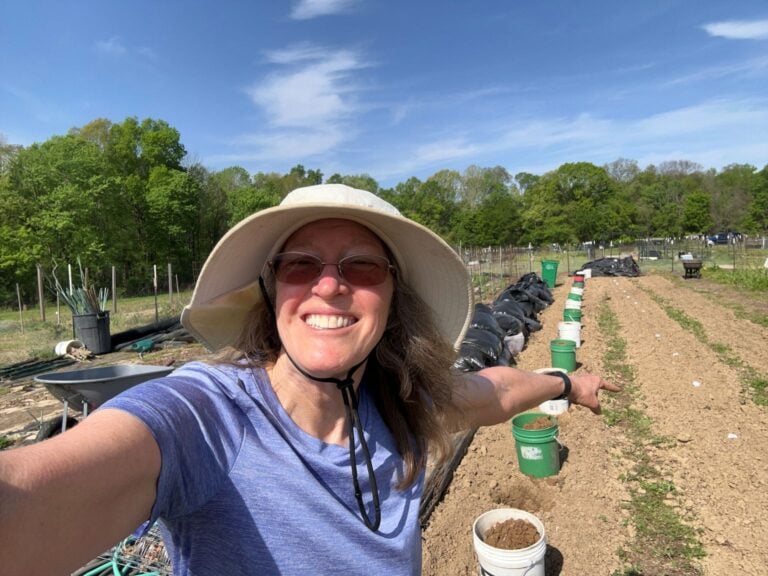
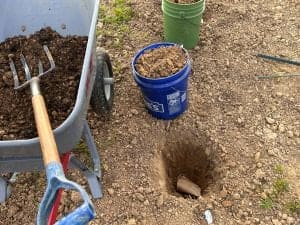
My recipes involve 5-gallon buckets, a shovel, my small handheld chopper to break clay clumps, a wheelbarrow for mixing, light—strength of Miracle Grow water, my compost, leaf compost, bone meal, fertilizer (either Triple 13 or 8-24-24), whole fish (brim) for tomatoes, McDonald’s paper bag, Epsom salts and lime.
I’ve created several soil recipes tailored to different plants. These recipes are based on my soil, but yours may be completely different and require different amendments. Instead of listing them all here, you can find each one separately—just click on the links below!
- Tomato Soil Recipe
- Basil & Flowers Soil Recipe
- Soil Recipe for Yellow, Zucchini, and Other Squashes
- Peppers & Eggplant Soil Recipe
- Melons Soil Recipe
- Cucumber Soil Recipe
Sometimes the best of plans gets interrupted by mother nature and that is certainly the case for my planting.
Planting and Mother Nature
Being “Farmer Nancy” or any farmer, rain is essential, but these past two months have been the rainiest since I started at the community gardens. April brought 14.71 inches, placing it just behind the 1991 record of 17.13 inches. To stay on my planting schedule, I had to plan my planting around Mother Nature, with finding new ways to adapt and not get too far behind.
You might be wondering what I did to adapt. I received dormant strawberry roots that needed to be planted a few days after I received them. To keep them in dormancy, I stuck them in the refrigerator. I had to come up with a plan as I knew I couldn’t plant all 30 plants with my planting method, and it was going to rain later that day. Since I was using the bucket method, where I dig out my holes and place the soil in 5-gallon buckets I got this brilliant idea. Dig out the holes and place all the buckets in my truck bed, which has a truck cover. Since I park my truck in our garage, the next day, once rain stopped, I was able to finish my planting.
Another way I adapted was by using two large pieces of black plastic that is approximately 12′ x 25, which was enough to cover my yellow squash and zucchini bed, as well as two rows of tomatoes. While all the other gardeners were waiting for the ground to dry, I was planting.
By the Seat of My Pants
Now that I’ve caught you up on some of my new and improved, by-the-seat-of-my-pants farming methods, the weather looks great for planting next week. I’m finally getting caught up, and by mid-June, the fall tomatoes will be all that’s left.
There’s still plenty of work ahead—staying vigilant with bugs, diseases, and fertilizing—but luckily, I have new and improved recipes for those too, which I’ll update when time allows.
As for my new and improved, by-the-seat-of-my-pants farming methods, it’s just like the old saying: “When life gives you lemons, make lemonade.”