Welcome to the SCCG Learning Plot 221. If you are getting started I am hoping the Learning Plot 221 can help get your garden off to a great start and all it takes is some basic planning. When you plan your plot, it helps to think about your layout and any weeds you may need to deal with before planting. These are the things I’ll walk you through in this post.
So, let’s get started you know the rules that a fence is temporary until you get the year round status which you can apply after your second season just before fall. You can still do a fence, but it has to be easy to take down.
Why Use a Fence?
There are two main reasons to fence: to keep humans out or to keep critters out.
If you are worried about humans, I understand fully. When I started my 2nd plot, the Back 40, I did not fence it. I planted watermelons, butternut squash, sweet corn, fall yellow squash, zucchini, and pumpkins. I had 7 watermelons stolen and my pumpkins, and the person who took my pumpkins left one on my walking path to show me I wasn’t doing good enough for them as it got rotten. So yes, a quick temporary fence made of plastic and the light aluminum stakes and zip ties is all you need. You would need to do your homework on where the best place is to purchase them.
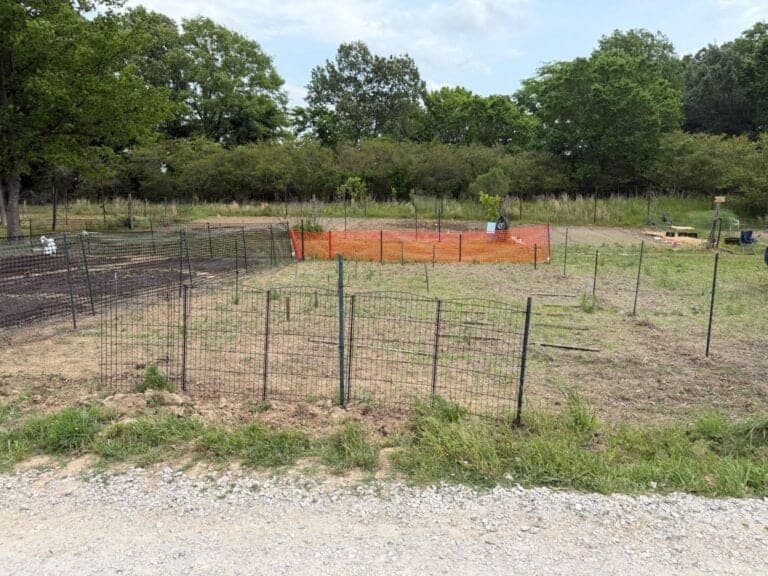
If you don’t care if people pick, but you are planting veggies rabbits love, then it depends on how many veggies you plan to plant that rabbits love. In the Learning Plot my fence is a patchwork of fencing, with two sides being chicken wire that hopefully will keep out rabbits. So the next fence that I should have on hand — as I used this fencing to rabbit‑proof my plots — is 1/2‑inch, 2‑foot‑tall metal fencing.
When I started fencing the plot, I thought the roll I had would fence my entire plot, but it was only a fifty‑foot roll. It was a good thing I checked all my fencing the day before to know what I could use.
One thing I didn’t count on was learning that the living mulch I seeded in the plot is a magnet for rabbits. In my plots I don’t have that problem. Living mulch might be something that a first‑time gardener might want to put off until they are a year‑round gardener with the right metal fencing.
Living mulch leads into the next plot problem — weeds.
Weeds
In our SCCG rules it states: no carpets, plastic, or synthetic ground covers or landscape fabric. The acceptable materials are biodegradable options only, like cardboard with either chopped leaves or wood chips. The chopped leaves are a limited supply, but the county provides wood chips, and we keep those stocked in rows 2, 5, and 8.
The best way to keep weeds out is to work at it — physically pull the weeds around your crops or hoe them out. If you are okay with spraying weed killer, that is an option, provided it is not a windy day and the drift does not go in your neighbor’s plot.
For three years all I used was a weed whacker, and it handled everything from edges to tight spots and even my whole pickle patch. A weed whacker is something most people can fit in their car, so it’s an easy tool to bring to the garden.
Last year I found a lawn mower sitting on the side of the road in my neighborhood, and after a friend tinkered with it, it now starts up like a charm. The mower keeps the wider walkways trimmed, while the weed whacker takes care of the areas the mower can’t reach, making the whole plot much easier to manage.
Depending on your tomato cages, this also dictates how wide your rows should be. I tried to make sure all my cattle‑panel tomato cages were roughly the same size so I could have uniform rows.
Last year some of them were much wider than the others, and our rows ended up too tight — I kept bumping into the cages with the 24‑inch mower. Having consistent cage sizes makes planning your row spacing so much easier and prevents those tight, frustrating walkways.
Right now I am tapped out of boxes for my own plot and thought the living mulch would solve most of my weed problems in the Learning Plot. One other thing I plan to do is use chopped leaves (if still available) and my pine needles to mulch around all my plants. This not only keeps weeds down, it will help retain moisture and soil temperature for the plants.
The last thing to plan is your plot design
Plot Design
For the majority of the gardens in SCCG are either 25 x 25 or 25 x 100. In my rows this rule does not apply as I have odd plots, like the Learning Plot is 25 x 40. Once you know your plot size it is time to get planning. One basic is which way your plot is facing to determine how your rows should go. Height of plants matter more in small plots. This is what I was thinking when designing the Learning Plot.
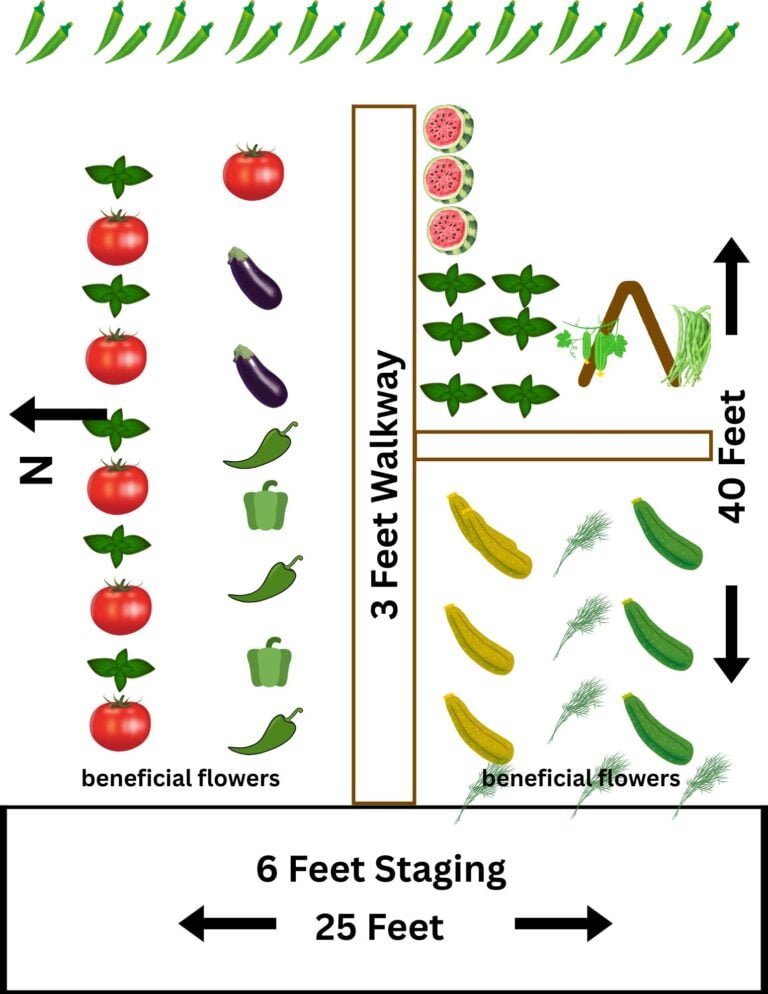
Tomatoes are on the north side of the fence going in a west to east row direction. Each tomato is spaced 5 feet apart with a basil companion/protection plant in the middle. Then 5 feet from the tomatoes are the peppers and eggplants. Peppers are spaced 2 feet apart and eggplants 3 feet apart. The okra is the only major crop that is running north and south along the east fence.
All of the plants or seeds are coming from my leftovers that I started as backups or have the seeds on hand. Yours doesn’t have to be fancy like mine — a basic drawing with dimensions is all that you need. I do suggest that you might want to use my favorite links to UT‑Extension or Farmers Almanac to help with the distance between plants. I like to give breathing room as our area is very humid which leads to disease pressure.
If you are in a small plot your staging area might be smaller, say 3 feet. I like staging as if you have tools or wheelbarrow then you have an area for prep or staging, or a place to keep your hose. Now the fun begins.
Now The Fun Begins
You have done all the basic prep work to start the fun. The main thing is to have all the basics covered — a plan in hand literally. I was out there today with all my dimensions marking where everything goes. One thing, if you plan on either tilling your plot or having it done by SCCG, then you might want to wait with putting your fence up until the tilling is done. Just remember the fencing is temporary and it must come down by November 1st.
You’ve done the planning, you’ve marked your rows, and now you’re ready to get growing. Every plot is different, and you’ll learn as you go — that’s part of the fun.
As far as the Learning Plot, it all depends on the amount of rain. If it comes like they are predicting, then I am hoping to plant as early as Friday — 5/1.
My hours for the Learning Plot are 10am–11am on Monday, Wednesday, and Friday, provided the weather cooperates. If you’re ever unsure, always feel free to text me.