Every January, I dive into my research for the tomato—and, if needed, cucumber—seeds I want to experiment with, along with the rest of my plantings. It’s also when I plan out any changes to my garden methods for the year. Some of those changes actually started in the fall, thanks to a free source where my husband and I went and dug up small plantings. What better way to get something you know is thriving than buying it at a box store, where you don’t really know if the plant grows well in my climate, or sight unseen from online?
Did I mention January is a busy month for me? Seed and plant research takes over my world, especially since in February my germination‑station rolling cart — full of heat mats and grow lights — comes out of storage. Let me tell you about the seed changes I’m making this year.
Seed Changes
Last year I had grandiose plans for both tomatoes and cucumbers. The goal was to trial all these different varieties and determine which ones were best in our soil and climate. It was a good thing I didn’t need to preserve canned dill pickles, because my only cucumber crop came later in the summer — and all those trials didn’t work out. I spent so much time planting over 134 tomato plants across 16 different varieties, in three planting windows (April, May, and early July). It might not sound so bad… okay, it was bad. :-/
I didn’t factor in rain, disease, pest control, and just general upkeep when it wasn’t raining. My plans could have worked if my garden partners had been fully on board. One was out most of the spring due to a broken ankle, and the other had bad knees and a bad hip — but that didn’t stop him from telling me to plant cantaloupe, corn, and watermelons. This partner expected everything to be started and planted by me, which took time away from my real focus.
This year, like the old Frank Sinatra song, I’m doing it my way.
Gone are the 16 varieties of tomatoes, and in comes Big Beef Plus. It’s an upgrade to the original Big Beef Hybrid, and I know it will do well in our climate because other gardeners have already had success with the new and improved version. I do plan to trial four of my old Big Beef Hybrid (the 1994 AAS winner) to see how they truly compare. The other four trial plants are Bradley — bred for Southern heat and disease pressure and developed by my alma mater, the University of Arkansas.
I’m keeping it simple for spring sauce tomatoes: 8 Amish Paste and 7 Jersey Devil. And for fall, I’ll plant 15 Opalkas. Fall planting is late June to early July. So if you’re keeping tabs, that’s 68 tomatoes — 38 in spring and 30 in fall. I learned two years ago that Opalkas do better in the later (fall) planting, and last year the Amish Paste did well, but I think their preferred time is spring. The Jersey Devils are supposed to be huge and shaped like a jalapeño.
As far as cucumbers, I’ll go through last year’s seeds since I had plenty of slicer and pickling varieties to try again. I might give an update later on what I eventually planted and how they did.
Other new seeds this year are bigger‑sized tomatillos called Plaza Latina. According to the seed seller, they are 3–4 inches wide and weigh about 4–6 ounces — much larger than the little cherry‑sized tomatillos. The last two my sister recommended are Hakurei Turnip and Honeyboat Delicata Squash. I am holding off on planting the Hakurei until fall, as I will be busy with my new plantings (which I will go into detail about a little later). She said she loves the Hakurei because they are sweet, mild, and can be eaten fresh in salads or whole like an apple. The Honeyboat Delicata are like butternut squash, but smaller — 6–8 inches long or about 3 inches wide — with a sweet, nutty flavor, and the skin is edible. Maybe she likes these for the small size, perfect for one person and less time to cook or microwave. I still plan to plant our tried‑and‑true Waltham butternut squash.
Now to my other plantings and the reason for them.
Self-Sufficient Gardening
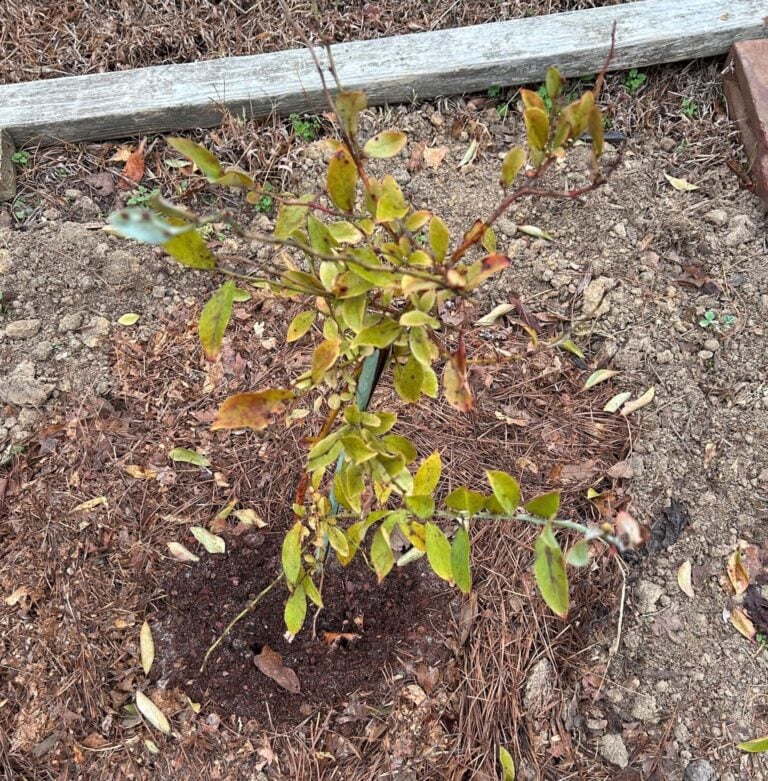
As I mentioned, I got some free plantings from my husband’s poker buddy. In early November we dug up some very small blueberries (twigs) and a few thornless blackberry canes. It sort of just fell into my lap, and when a free opportunity happens, I jump on it. It wasn’t until I planted the blueberries that I had an epiphany — making my gardens self‑sufficient. Three gardens — Pickle Patch, Back 40, and Rudy’s Radish Ranch — each plot is 25 feet by 100 feet. The Pickle Patch has defined beds of different sizes, Back 40 is completely open with no defined beds yet, and Rudy’s Radish Ranch is a landscape fortress where Rudy made small planting holes, which I opened up so it could breathe. This is a lot for basically just me to manage. One partner has a very demanding job and can only help once a month or so. The other partner just wants to pick, since he has bad knees and a bad hip. As long as he contributes money toward all my expenses, I am fine with that — it’s sort of what a Community Supported Agriculture (CSA) does. My solution is simple: planting perennial crops that we love, that I don’t have to worry about replanting again for a long time.
I planted seven blueberry twigs, which are a high‑bush type, and in between them I have my two lonely strawberry survivors (Seascape) from the thirty I planted last year. I moved them to the blueberries so I can reassign the strawberry bed. I transplanted the strawberries on January 5th when the forecast predicted warm weather for at least ten days. I carefully cut around them with a shovel, leaving several inches from the plant.
I then mixed Nancy’s special strawberry soil blend for planting:
1 scoop (2 cups) peat moss
1 scoop (2 cups) pine fines
1 scoop (2 cups) native soil
1 handful (1/2 cup) finished compost
1 handful (1/2 cup) Black Kow
1/2 cup coarse sand
Sprinkle in the bottom of the hole the biological helpers:
a pinch of mycorrhizae
cinnamon for fungal protection
Like the blueberries, I mulched around the plants, keeping the mulch (chopped leaves topped with pine needles) three inches away from the crown. Then I watered them in. After that, I pre‑seeded the bed with white Dutch clover — a living mulch — to make this bed as self‑sufficient and natural as possible. Both the strawberries and the living mulch will help keep the soil cool, choke out weeds, attract pollinators, and the clover will give the added benefit of providing nitrogen.
Where the strawberries were will be my new asparagus bed. The bed is 8 feet by 13 feet — enough space for twenty‑four Millennium plants. I chose this variety because it’s tougher, handles Memphis weather better, resists disease, and produces more. What’s not to love! This bed does not receive living mulch, only chopped leaves and pine needles. The companion plant that asparagus tolerates is dill, which works out well because I need dill for my pickles. I am not throwing dill seed all over the bed — it has dedicated planting locations on the south and west edges. From my research, dill doesn’t crowd the crowns, doesn’t cool the soil like clover, dies back early, and attracts beneficial insects that help control the asparagus beetle.
If you’re counting, that’s two beds I don’t have to plant year after year. The third perennial bed is already in my established herb garden. The back half failed last year — that was supposed to be my dill bed. Too much rain killed it, so I replanted it in late summer where the asparagus is going, and it thrived. The herb garden has enough space for two crimson red rhubarb. I also have enough wiggle room to include the lavender blanket — pre‑seeded in a natural fabric. I lay it out and cut it to the length I need. I’ve never used this before and hope it works, as I have this roll and the other four rolls are wildflower pollinator mixes that will be used in between my tomato spaces.
The next perennial plant is going to fill one voided spot — a potential weed area — where a Bocking 14 (sterile comfrey) didn’t grow. That’s perfectly fine, because Big Top horseradish will love this location. It’s bordered by landscape timbers on two sides, which will help contain it. I’ve given it two feet of space from the other plants since I’ll be harvesting the roots, and because I need to dig those roots in the fall, the chopped leaves and pine needles will help keep the soil loose for that all‑important digging.
The last few perennial plants are in the Back 40 along each long-side border. In the fall I started my transformation of these borders was 3-fold— help with water run-off from Rudy’s Radish Ranch fortress, weeds, and are beneficial in some way. Back in the fall I dug up some of my bocking 14 roots and planted them on Rudy’s side every 3 feet and on the fence border every 5 feet. Some started growing and some didn’t and again I am flexible and can plant other things later. On the fortress border besides the bocking 14, I also kept the Thai or Genovese sweet basil plants still there and any flowers like marigolds as there were a lot of seeds in an around those plantings— to see if they will re-grow on their own—to save me time not having too again. 🙂 The other spots I seeded in the fall were Stevie’s poppies from Grimsby, UK. The final plants I will put along here are my Aldi ginger that I started because I saw them sprouting eyes. We love ginger in my creation called pepper jam Asian stir fry and my butternut squash soup. Yummy!
The other long border has the big square cattle fence and I have bocking every 5 feet as I thought I could plant other things and I have. The fence being nice big squares make a nice trellis for my blackberries.
This is a good start to my self-sufficient gardening can you guess then next phase that I discovered by accident. The hint is chopped leaves.
Final Piece to Self-Sufficent Gardening
The final piece to making my garden truly self‑sufficient is using what nature gives me. I had been chopping leaves from my own house with my leaf chopper and thought I had plenty — enough to till in later and to use as mulch around my plants. Everything seemed under control.
Then a couple of things happened. I’m not sure I mentioned this, but I’m a board member at the community gardens and I’m responsible for two rows. That means I assign plots, handle plot abandonment, and even clean out the ones people leave behind. One of my year‑round gardeners told me he wouldn’t be returning and was clearing out his plot. That was fine — but suddenly a huge pile of chopped leaves appeared there. I called him to check, but he said it wasn’t him. So I started taking the leaves, because the more the merrier. I bagged some, but there was still a mountain left.
Then we had several days of frigid, below‑zero weather, and my cover crops — the white mustard and daikon radish — finally played out. Since they were dead, I figured I could spread the extra leaves over those beds and get them ready to till in later. I avoided the living crimson clover areas and only covered the played‑out sections. I had the pile almost gone — and wouldn’t you know it, another load of chopped leaves showed up. At that point I decided to create a large pen to hold the leaves so they can break down into black gold. I may have to build a second pen because this one is already overflowing, but that’s a good problem to have.
It wasn’t until later, when I was researching and watching videos and describing how my tomato beds looked, that I realized I had accidentally set up a no‑till system. I love tilling, but the soil doesn’t love the disturbance. In my first few years, tilling made sense because my soil was pure clay. By the third and fourth years I had started using cover crops to build it up. With no‑till, you only disturb the soil where you plant. A good example is the Back 40 tomato beds: all I need to do is brush the leaves aside, dig my tomato hole — I may try my battery‑operated drill with augers to make the right‑sized holes — add my amendments, plant, and pull the leaves back around the plant (about three inches away from the stem). That’s it. By using this method, all the living organisms in the soil can do what they’re meant to do. I’ll report my progress as I go, because this is new for me too.
Final Garden Experiments
My new experiments are chugging along — my seeds have been delivered, my perennial beds are being prepped for late‑February to early‑March planting, and I’m getting ready to start the first plants indoors. By paring down the number of tomato varieties and the number of planting waves, I’m freeing myself up to plant and take care of the whole garden.
By moving my garden toward being more self‑sufficient — perennial beds and a no‑till method — my goal is that by the end of May, when I leave for my vacation to explore Nottinghamshire, it won’t need too much maintenance from my partners. And with any luck, we’ll reap a bountiful harvest for my family, my partners, and my church’s drive‑thru food bank.
I think these new experiments are better than last year’s — what do you think? Let me know in the comments below.
Happy Gardening!